

Quick and Easy Layered Chicken Enchiladas Verde
A simple and incredibly delicious enchilada casserole. This recipe has a very short ingredient list and comes together quickly. I often will make one for me, one for the freezer, or one for a friend. If there are any leftovers, it’s your lucky day because these chicken enchiladas taste even better the next day! This is a favorite for my family, and I’m positive it will become a family favorite for you too!

Why I love this recipe so much
This is a great recipe for meal sharing and for freezing. Simple ingredients, it can be made a day ahead and baked when ever you need it, and the leftovers are amazing. What’s not to like? This recipe has been adapted from Annettes Enchiladas from the book Bread &Wine. Bread & Wine is a collection of essays by Shauna Niequist about family relationships, friendships, and the meals that bring us together. Shauna also shares many wonderful and comforting recipes that she makes for her family and friends, including the recipe for Annette’s Enchiladas. After the birth of her first child Shauna’s friend Annette brought her a pan full of enchiladas and now it’s a recipe she always shares with friends after they’ve had a baby. This recipe is some serious comfort food! And now it’s one of my favorite recipes to share with friends and family.
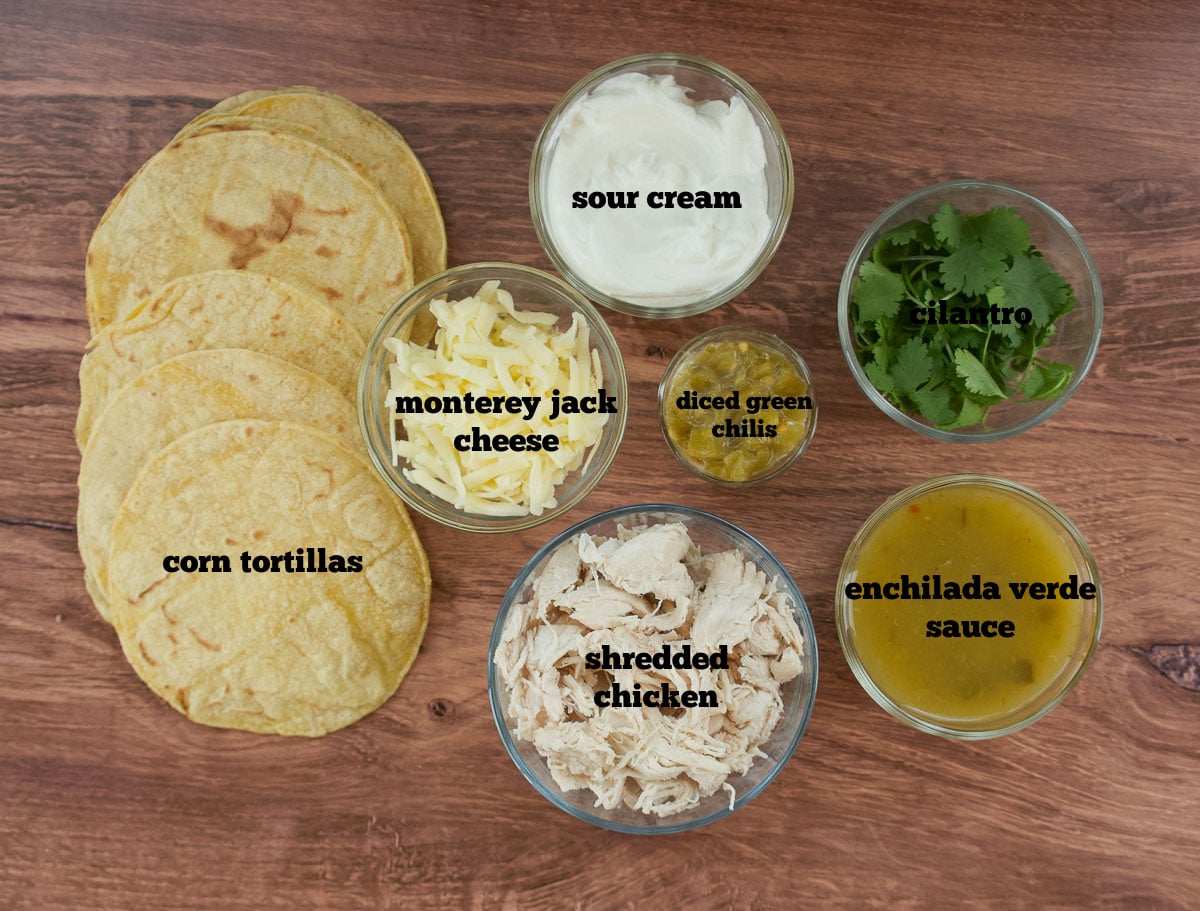
Gather these ingredients
How to make this enchilada recipe
Preheat oven to 350 degrees F

Start by cooking your chicken. I prefer to poach my chicken. Bring water to boil with a tablespoon of salt. Should be enough water to cover chicken breasts. Cook for 20-30 minutes or until internal temperature of the breast at the thickest part is 165 degrees F. Or when it pulls apart easily with a fork and is not pink on the inside. Remove cooked chicken to a baking sheet and let stand for 5-10 minutes, then pull the tender chicken apart with forks so that it’s in bite sized pieces.
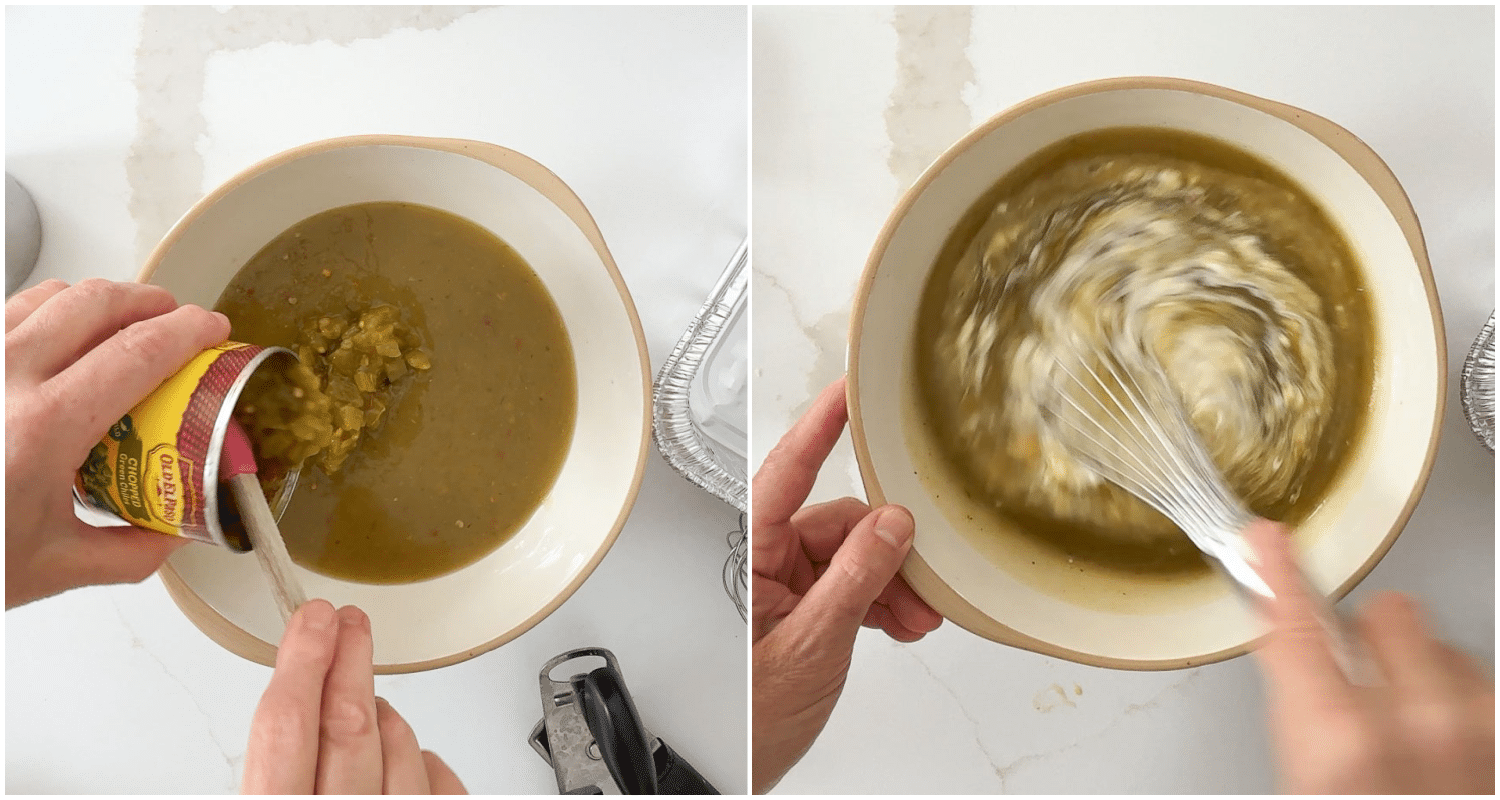
In a large mixing bowl, mix together a 28 ounce can of enchilada verde sauce (Las Palmas is the best), 1 cup sour cream, and two 4 ounce cans (or one 7 ounce can) of diced green chilies. Set aside.
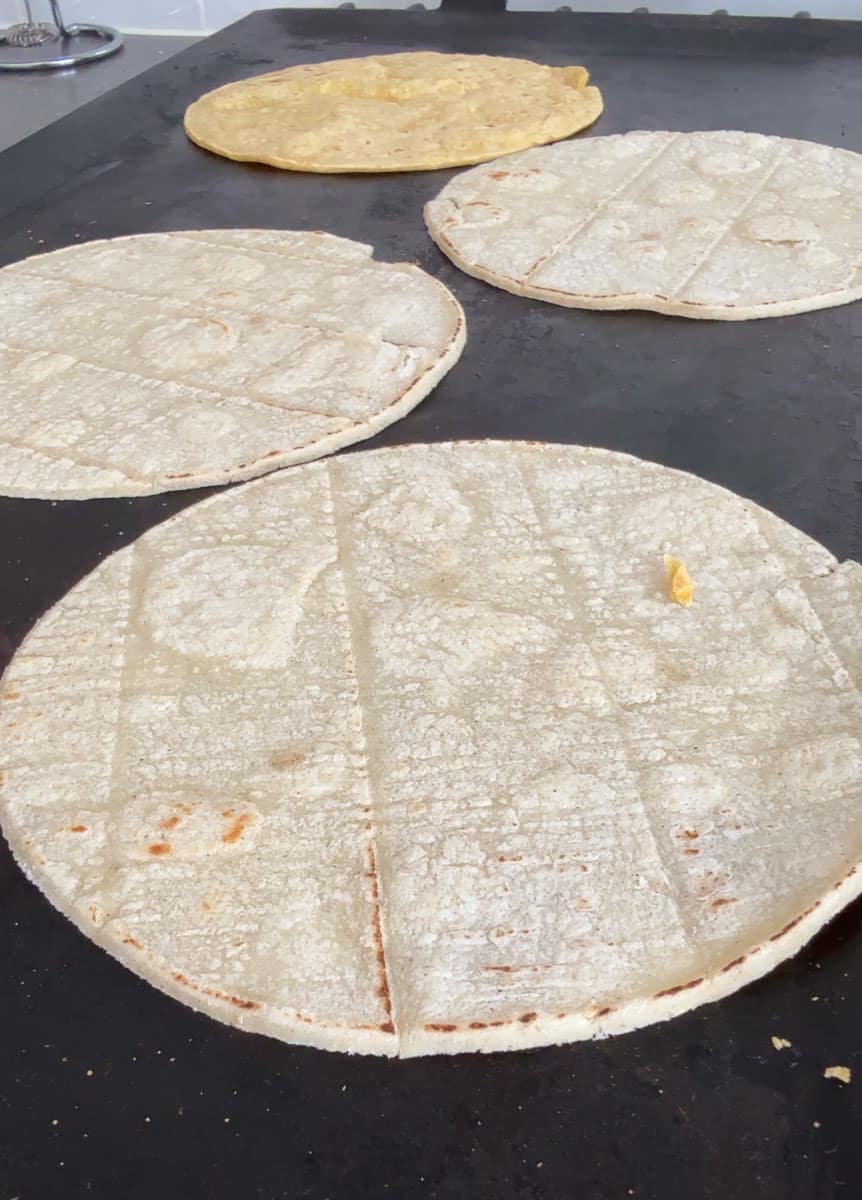
In a non stick skillet or a griddle cook the corn tortillas for about one minute on each side. Remove to a cooling wrack until all the corn tortillas have been cooked. They will bubble up a bit and should get slightly browned.

This chicken enchilada bake will come together quick and easy if you create an assembly line with the shredded chicken, shredded cheese, cooked white or yellow corn tortillas, and the enchilada sauce.
- Ladle a cup of the sauce into the bottom or your baking dish.
- Next layer the corn tortillas over the sauce. You may need to cut the tortillas in half or quarters to get all the area covered.
- Layer 1/3 of the shredded chicken on top of the tortillas.
- Cover shredded chicken with one cup of monterey jack cheese.

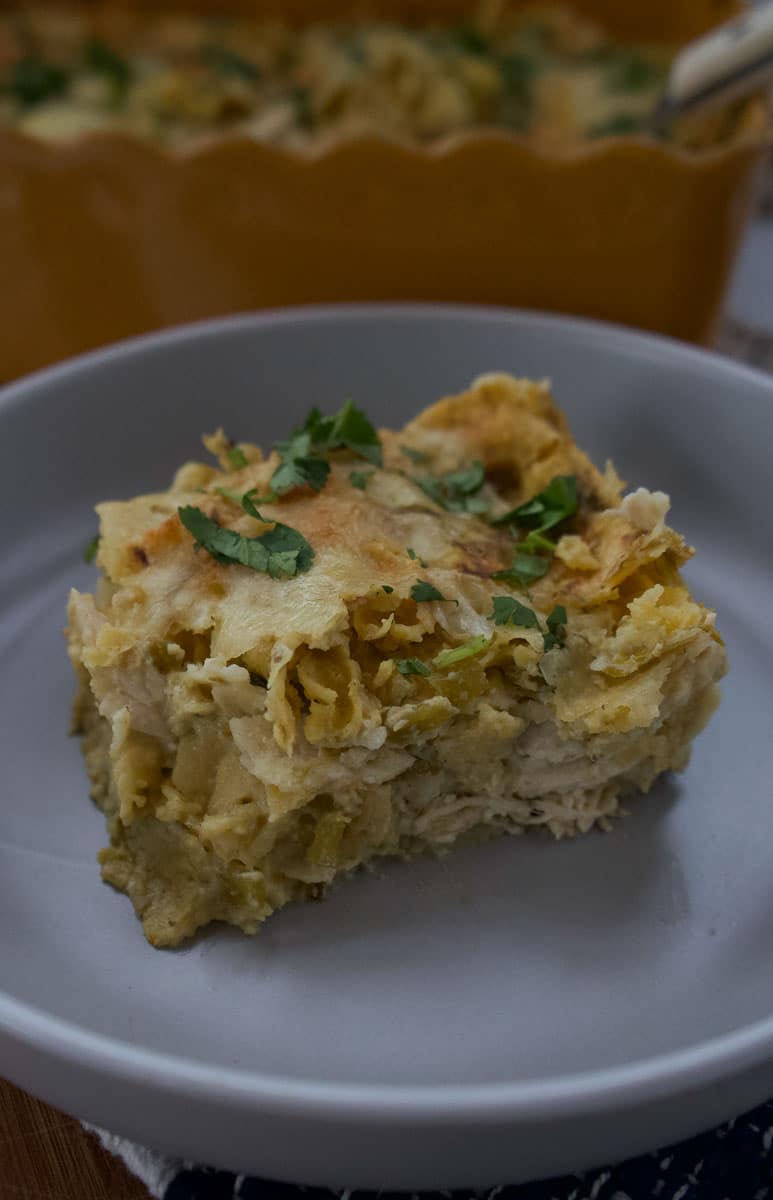
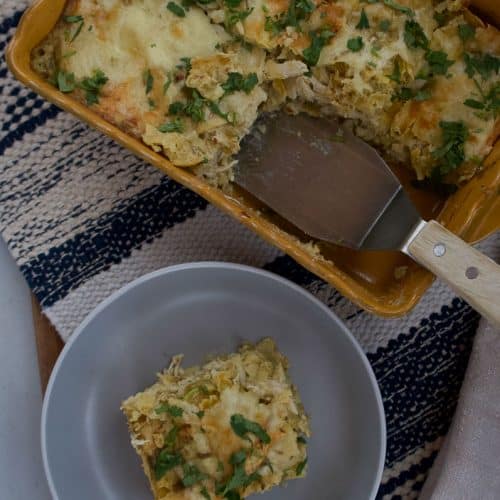
Cover the final layer of tortillas with the remaining sauce, and remaining cheese. Place in 350 degree F preheated oven and bake for 45 minutes. Remove, cut into 8 pieces, garnish with fresh cilantro, and serve it up!

I love me an easy recipe that can be made ahead of time. What’s better than a make ahead recipe for busy weeknights? Make ahead recipes are also great for giving. After I had my babies it was nice to have a meal in the refrigerator or freezer that I could just pop in the oven. In that nesting stage I would double dinner recipes. As long as I was making one I might as well make two, what a great way to fill up your freezer. By doing this I had freezer full of meals before baby arrived. These days I do it, so when I know someone that could use help I have a meal ready and waiting in the freezer.

This easy dish is a winner! Perfect crispy edges with melty cheese and all the flavors of your favorite enchilada verde recipe. These enchiladas could be served with Spanish Rice, pica de gallo, and guacamole.
Tips & Variations
- Leftover Rotisserie Chicken is perfect in this recipe. Make sure you have at least 4 cups of shredded chicken, more is fine.
- Chicken – while we are on the topic of chicken you do not have to use chicken breasts, chicken thighs are delicious in this recipe.
- Cheese – what type of cheese you use is totally up to you I prefer to use Monterey Jack, however there are times that all I have is cheddar cheese so I use that. Pepper Jack Cheese, and Colby Cheese also work great in this recipe. Feel free to add more cheese, lots of cheese is not a bad thing.
- Variation: Add black beans or cannellini beans instead or in addition to the chicken. I often will add beans if I’m using leftover chicken and I do not have quite enough chicken, then I add beans.
- Freezing – Complete the recipe and cover with plastic wrap pressing the plastic wrap down into the top of the enchiladas, so no air can get to it. Then I cover it with a layer of aluminum foil. Make sure that it is securely wrapped and tight around the edges, this will help avoid any freezer burn or any freezer flavors getting into your food. Write on top of the aluminum foil the date, what’s in the casserole dish, and how to cook it. (thaw, remove plastic and foil, and bake at 350 degrees for 45 minutes)
- Serving – I love to make my Spanish rice or cilantro lime rice (How to make cilantro lime rice = after you make white rice squeeze the juice of one lime into the rice add chopped fresh cilantro and using a fork fluff the rice.) and my Mexican corn bake to go with any Mexican food that I’m making. Of course you can always top your enchilada recipes with a dollop of sour cream, pico del gallo and guacamole !
What are your favorite easy meals to double and then freeze are? Some meals lend themselves better to freezing than others. Here are a few of my favorite meals for sharing.
Freezer Meals
If you could take 2 seconds and give this recipe a star rating below I would greatly appreciate it! From my table to yours with love, Sheila
Quick and Easy Layered chicken enchiladas verde
Ingredients
- 1 cup sour cream
- 28 ounces green enchilada sauce Las Palmas is the best
- 8 ounces cans diced green chilies 2 cans
- 3 cups cooked chicken shredded (a roasting chicken from grocery store works great)
- 3 cups shredded monterey jack cheese
- 15-18 corn tortillas
- chopped Cilantro for garnish
Instructions
Preheat oven to 350 degrees.
- ~ Mix green sauce, canned chilies, and sour cream together in a bowl. Set aside.
- Cook corn enchiladas in a non stick skillet. Cook on each side until they just start brown. Remove and set aside until all the corn tortillas have been cooked. About one minute on each side.
- Assembly: Spread 1 ladle full of sauce mixture in bottom of a 9×13 baking dish. Layer corn tortillas on top of sauce. Next a layer of chicken, then cheese, sauce, repeat…tortillas, chicken, cheese, sauce. Last layer is tortillas, sauce and cheese. You should get three layers of corn tortillas.
- Bake at 350 degrees for 30-45 minutes or until warmed through. I like my cheese to get bubbly and browned around the edges. Let sit at least 15 minutes before cutting into squares. Garnish with cilantro.

Mine was really mushy. I used yellow corn tortillas/taste was ok, but didn’t really like the texture. Did I do something wrong?
Karen, You toasted the corn tortillas in a pan or griddle first? after baking it should be sturdy, when you slice it. Honestly the original recipe called for putting the corn tortillas in chicken broth before layering which I thought made it extremely weird texture, but the taste was good. So I converted to crisping the tortillas up. I’m sorry this wasn’t your favorite. If you cooked the tortillas, I think you did everything right. Maybe just not your favorite? Which I’m sorry about. Thanks for reaching out, I hope you try other Eat2gather recipes! Sheila
Delish! I’ve made this recipe several times from the Bread and Wine book, and we love it. I just came across your version to add a can of beans to the chicken layer–genius! And now I want to make these for dinner tonight, with beans of course… 🙂
Thank you so much for sharing! This sounds delicious! I am going to make this tonight to take to a friend tomorrow. Should I put it all together and freeze it and let her bake it at her house, or should I just keep it in the fridge? Thank you!
I’m so sorry that I did not respond sooner. I have done it both ways. I usually ask if they would like the meal to come ready to eat or if they want to bake it themselves. I hope they enjoyed it. Thanks for visiting E2g! <3 Sheila
Oh Sheila, don’t you know carbs are a pregnancy woman’s best friend! These enchiladas sound ahhh-mazing!! So easy and awesome and a perfect addition to the shower!
It’s been a while since I’ve been pregnant, but I know Mexican was then and still is one of my favorites! Oh carbs how I wish I didn’t crave you….
Thanks for stopping by! xoxoxSheila
Shelia- these enchiladas look amazing! Suddenly I feel like I need that hot and gooey cheese. Haha. But seriously, very smart thinking to do a freeze-ahead meal for our sweet Mommy. 🙂 So glad to ‘meet’ you and make a new friend!
{hugs} Callie ; ) thanks for stopping by! and yes cheers to new friends!!! Sheila
Sheila, thank you so much for sharing these. I love enchiladas and I love how easy these stacked ones are. Talk about a winner! I’m so glad you joined us for Nikki’s shower!
Wowza, Sheila! We love our enchiladas around here, so this is definitely going on my ‘To-Do’ list. So much fun partying with you today! 🙂
Thanks for stopping by E2g! I hope you do try these enchiladas they were life changing for me! xoxo Sheila
Oh, I just LOVE chicken enchiladas smothered in cheese! Your’s are making me SO HUNGRY!
Lisa, Thanks for dropping in! It’s been a fun baby shower! Sheila
Thank you so much for joining in the fun for Nikki’s shower! The book you mention sounds really neat, definitely something I think Nikki would enjoy! And you’re also a girl after my own heart with these enchiladas! Yum!
Thanks Jessica! You and Kelsey did a great job with Nikki’s shower. ; D Sheila
These look amazing, Sheila!
I’ve been wanting to read Bread&Wine ever since you posted a pic of it on Instagram! Now, I can’t wait to make this recipe from it!
Thank you, Sheila, for contributing to my shower. I’m so glad to have met you last fall and look forward to when we can see each other again!! You are truly a treasure!!
Nikki,
You will love this book! Guaranteed. It is so speaks to those who truly love others by gathering them around the table. Can’t wait to see you in Austin!! xoxo, Sheila
These look so insanely delicious!!!