

Easy Homemade Cheese Crackers
Cheesy, salty, tender bites of melt-in-your-mouth cheesy crackers. These cute little cheesy buttons make a great nibble for your holiday party. My mom would make these homemade cheese crackers every Christmas, but you don’t need to wait for a special occasion to make them. A few basic ingredients are all you need to make these delicious crackers.

Why I love these crackers
Who said Christmas cookies had to be sweet? How about a cookie of the savory sort? Growing up my mom, my sister, and I aways made an assortment of cookies at the holidays, but one tasty morsel my mom would make wasn’t your traditional sweet cookie, was these cheese crackers. You know I love cheese. I have always loved cheese. I could not keep my dirty mitts off these tasty bites when I was a kid. I usually had to be quick about snitching these because my mom usually made this recipe to be given as gifts. She would pack them up all cute, and put a bow on them, and give them away to neighbors, teachers, bus drivers, the Avon lady, you name it my mom was the queen of the homemade gifts, and cheese buds were one of her specialties. What were her other specialties? Knitted slippers, jams, jellies, liver pate’, macrame plant hangers, cookies, breads, seriously our house was like a craft barn at Christmastime!
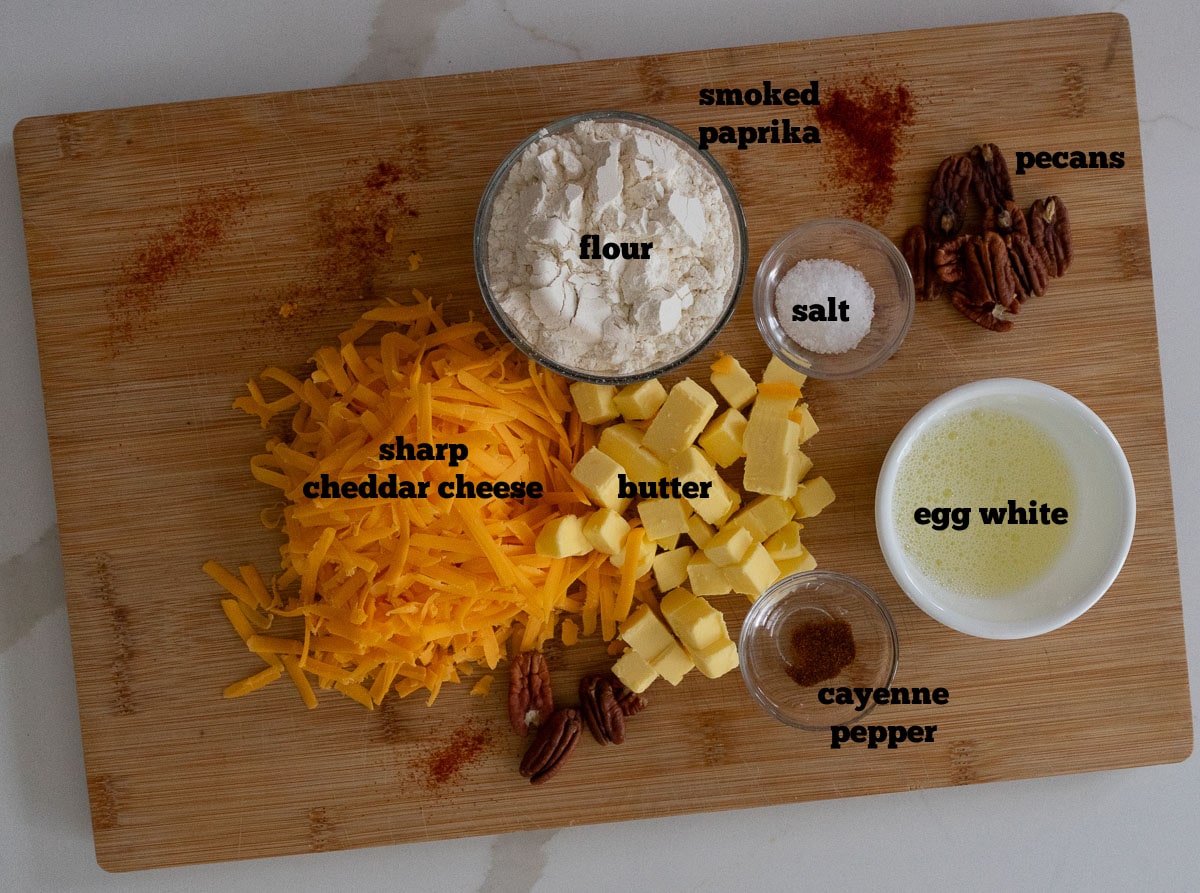
Gather these ingredients
How to make Cheesy Crackers

Add 8 tablespoons of butter (cold and cut into cubes), shredded sharp cheddar, flour, cayenne pepper, and salt to food processor. Pulse until ingredients form a ball. At first it will be crumbly and seem like its not going to come together, give the food processor a few more pulses until everything is combined and coming together.
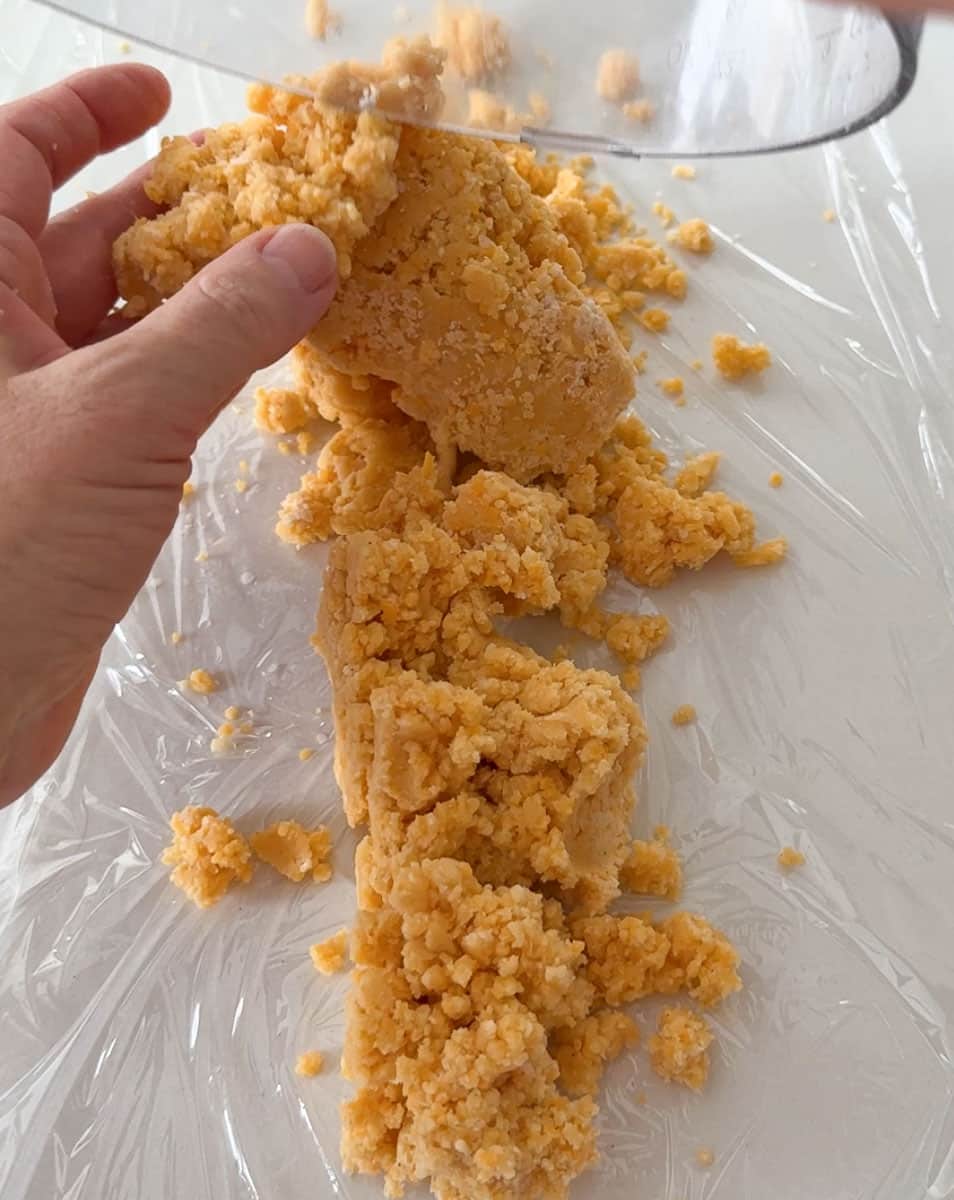
Lay a piece of plastic wrap out on your countertop, then dump cheese cracker dough out on to plastic wrap. Pull plastic wrap around dough to form a disc, or a long roll. See below to decide which you want to do.
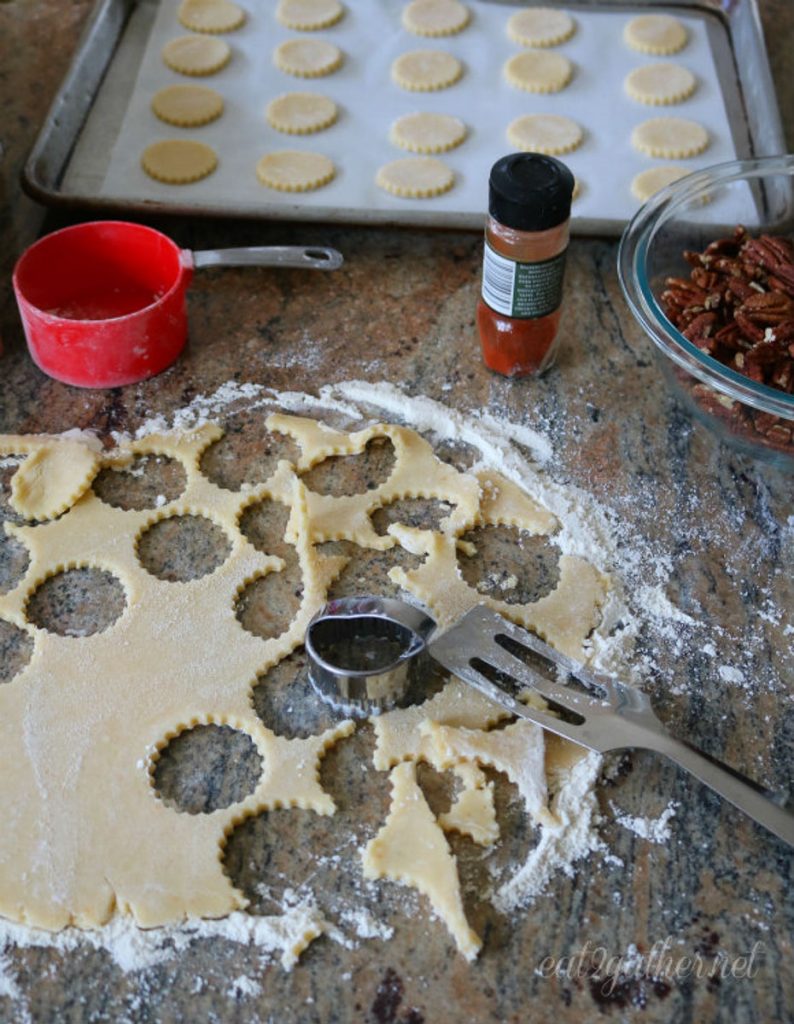
There are two methods, you can use a rolling pin to roll out the dough and use a cookie cutter to cut out bite sized crackers. This will give you a more consistent size, but it will also take more time. If you want to cut into different shapes, form dough into a disc, refrigerate for at least one hour before rolling out on a lightly floured countertop and using small cutters to cut into bitesized crackers.

Or a simpler alternative is to roll the dough into a long tube and refrigerate for at least an hour.
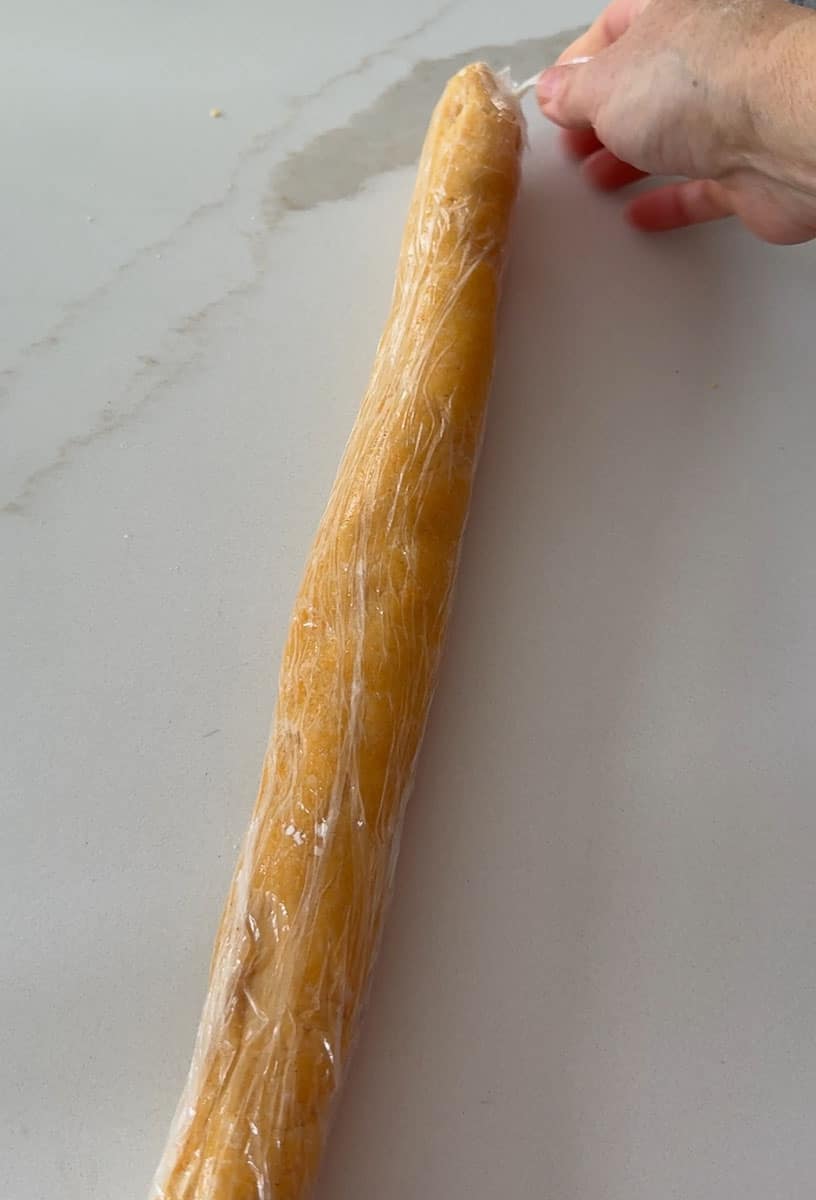
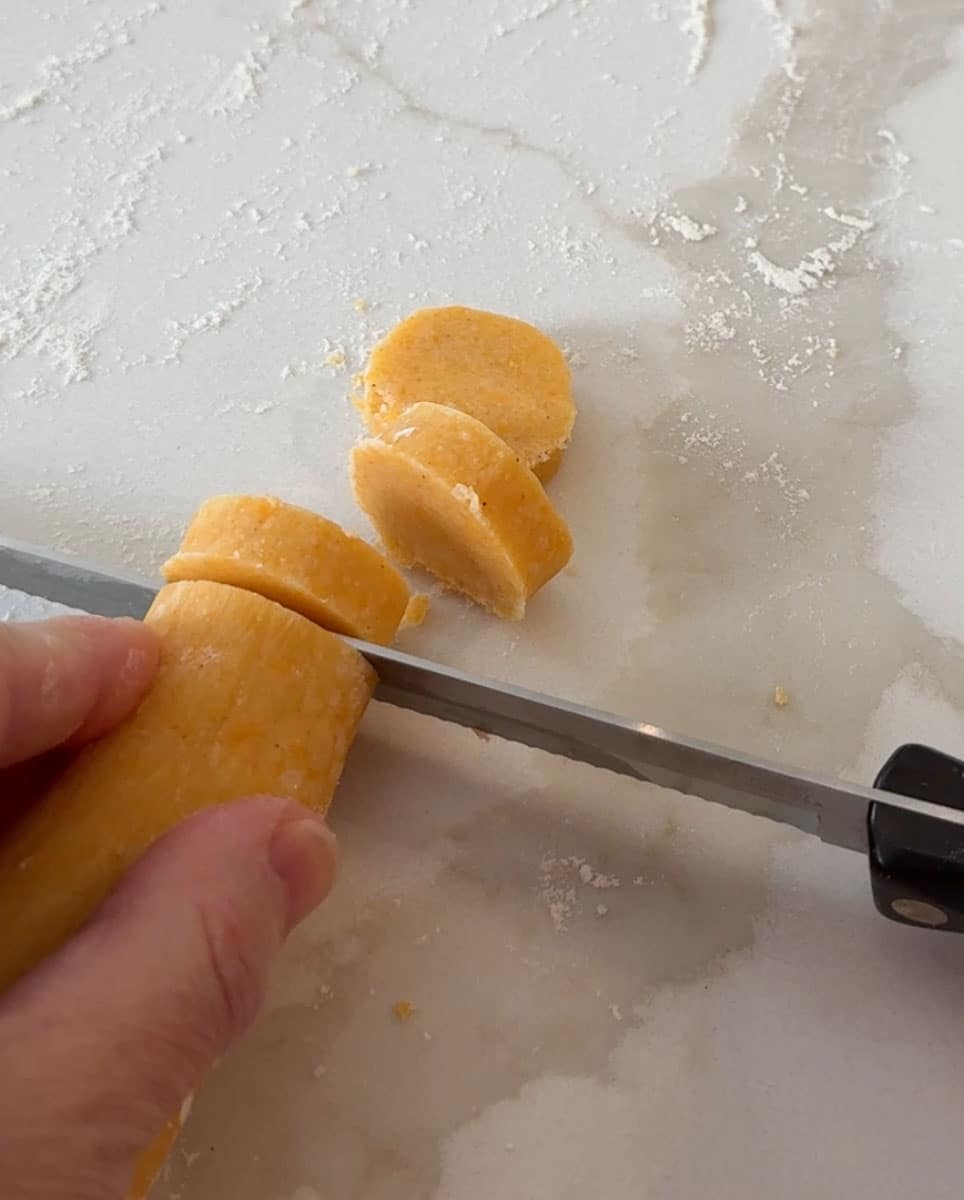
Slice into equal portions, just under 1/4 inch thickness.
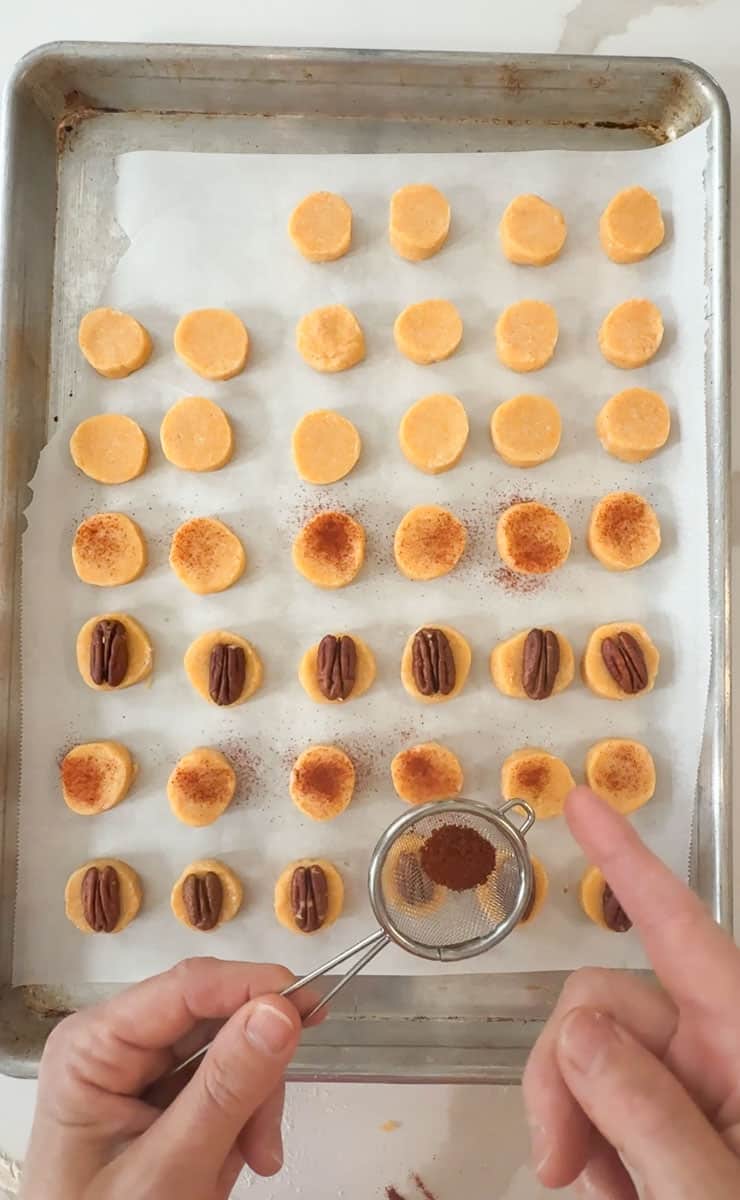
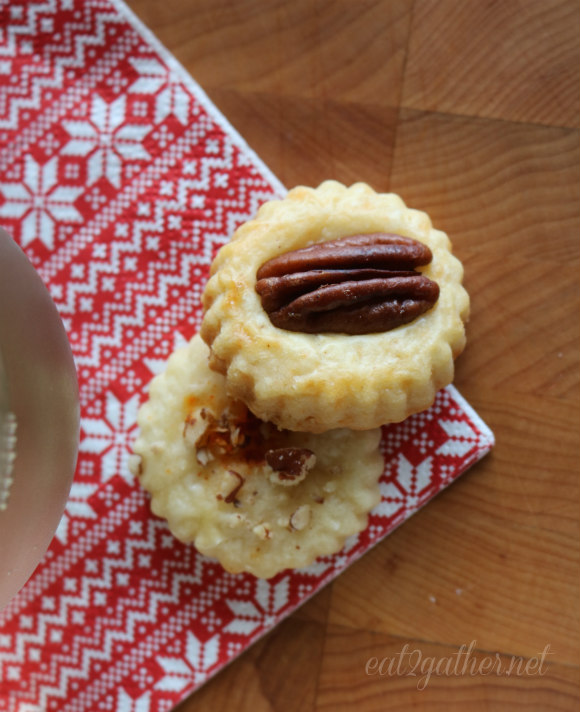
Line a baking sheet with a piece of parchment paper. Cheese crackers can be left plain, your you can brush them with egg white and dust with smoked paprika or place a whole pecan on top.
Place crackers in a 350 degree preheated oven for 15 minutes, however I would check these at the 12 minute mark to make sure they are too brown. You want the crackers to be done but not too brown.

Tips & Variations
These delicious crackers are do tender, and so simple, made with real cheese.
- Cheese: Sharp cheddar is a non-negotiable. You can use white or yellow sharp cheddar when making these crackers. Or use a mix of both. Extra sharp is also acceptable. These crackers need a cheese with some punch for the cheese flavor to stand out.
- Toppings: After brushing with egg white sprinkle chopped pecan on the top of crackers before baking. Or lay a sliced almond on top of each cracker. Sprinkle crackers with everything seasoning, sesame seeds, or very finely chopped bacon. My favorite is a dash of smoked paprika or fresh cracked pepper.
- Add-ins: Add 1/2 cup of finely chopped pecans, or almonds, finely chopped bacon (be sure to press the grease out thoroughly before chopping, or add 1 tablespoon of everything seasoning.
- Storage: Once crackers have cooled store in an airtight container for 2 weeks. These crackers can also be frozen for 6 weeks. Remove from freezer and allow them to thaw before serving.
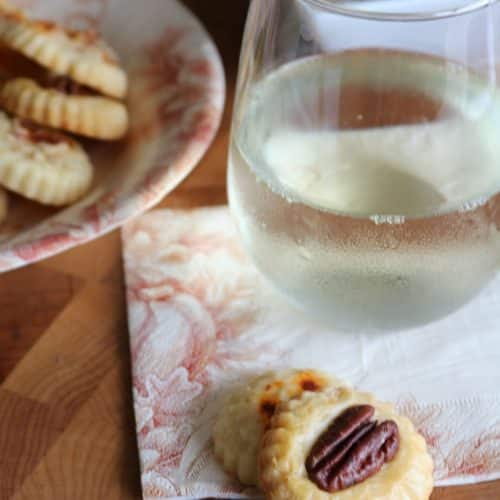
- Gifting: These cheesy crackers are the perfect little gift for just about anyone! And they are a great little add on when gifting a bottle of wine!
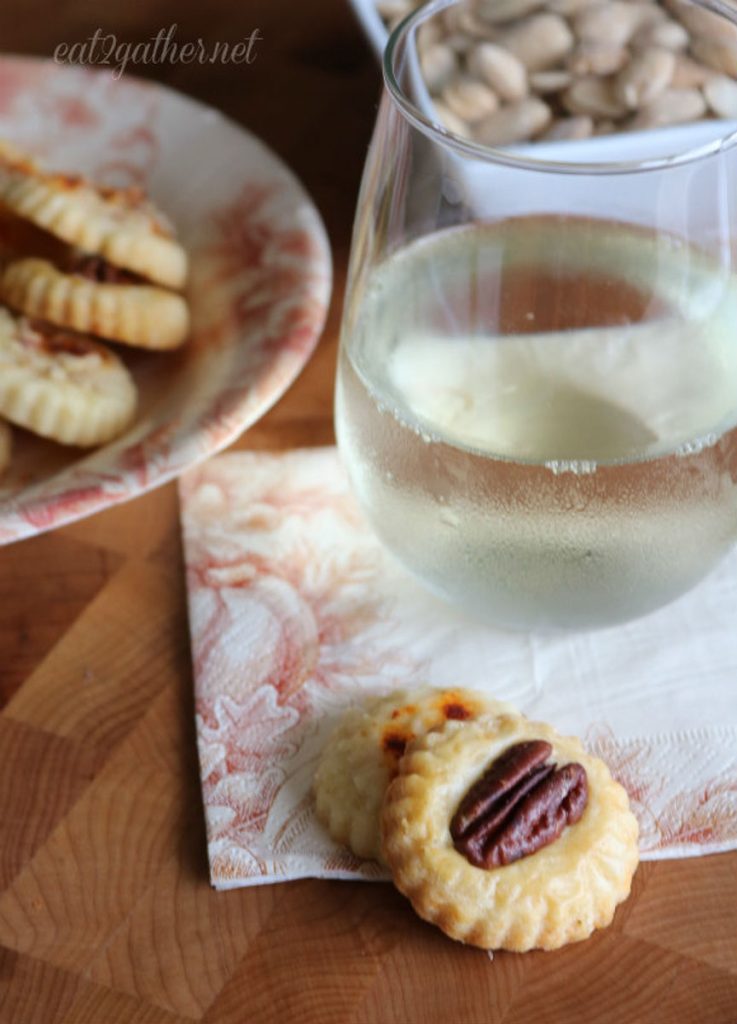
Not only are these little cheesy bites of goodness perfect for gifts they are the perfect nibble for parties and to have on hand for unexpected guests. They can be kept in an airtight container for up to a week or in the freezer for a month, so easy to keep on hand and place on a plate with a little bowl of mixed nuts Voila! Nibbles are served!
Honestly these crackers are so delicious, and like nothing you can purchase in the store. Your guests will be in awe that you even made the crackers. Don’t tell them how easy they are!
Please take a moment to rate the recipe below in the recipe card, or share on your social media! If you you are not following me on social media PLEASE DO! You can also get updates on my substack here.
Cheers! XO Sheila
Easy Homemade Cheese Crackers
Ingredients
- 4 ounces sharp cheddar cheese, grated (approximately 1 cup)
- 1/2 cup butter, cold and cut into chunks I use salted butter. If you use unsalted add 1/4-1/2 tsp sea salt to the dough.
- 1 cup cake flour all purpose flour can be used if you don't have cake flour on hand
- 1/8 tsp cayenne pepper
- 1 egg white whisked till frothy, but no peaks
- smoked paprika for garnish
- whole pecans for garnish
Instructions
Preheat oven to 350 degrees. Line baking sheet with parchment paper.
- Grate cheese.
- Add flour, cheese, butter chunks, and cayenne pepper to a food processor. Turn food processor on and allow to process until ingredients form into a ball. This will take approximately 1 minute.
- Remove dough from food processor, wrap with plastic wrap and press into a flat round, or into a long log that is about 1 inch diameter. Place in refrigerator for 1 hour and as long as 24 hours.
- Dust counter top with flour and roll out dough until its 1/4 inch thick, using a 1 inch round cookie cutter (you want your cheese buds to be bite sized) cut out rounds and place on parchment paper lined baking sheets. Or if you cut 1/4 inch slices if you are going with the roll method.
- Place a pecan on top of rounds, using a pastry brush lightly paint each cracker with egg wash, and sprinkle with smoked paprika.
- Bake in 350 degree oven for 15 minutes or until buds just start to brown around bottom edge. Check after 12 minutes.
- Remove from oven, and immediently remove to a cooling rack. Allow to cool and store in an air tight container for put to 1 week, or freeze for 1 month.
Notes
another idea: add some bacon bits to your recipe for a different flavor.”
Nutrition
Disclaimer: I am proud to be a part of blogger network that works with the United Dairy Industry of Michigan. Thank you for helping support Eat2gather by supporting your local dairy farmers!


I’ve made this recipe several times. I even have a copy of the Farm Journal that it appeared in. One change in the directions however. Instead of rolling out and cutting out I roll the dough into a 1 inch round log. Chill for about an hour, then cut one fourth inch slices and place on baking sheet and continue from there. Saves some time, energy and floury mess.Enjoy!
another idea: add some bacon bits to your recipe for a different flavor.
Thank you for this tip! The bacon bits are also a genius idea. Thanks for taking the time to contribute to this space. Cheers! Sheila
I thought these were cookies when I looked at the pictures without reading the words. 🙂 These would make perfect holiday crackers. Yummo.
Hope you are well Maureen! Thanks for taking the time to say Hi 😉 and yes these are YUMMO! xox Sheila