

The Best Pie Crust Recipe
Learn how to make tender flaky pie crust from scratch. Let me walk you through all the steps and calm any fears you have about making pie crust at home.
This post was first published in 2011. I have since add a few more tips and tricks and updated photos. Please don’t hesitate to reach out with questions, success, and failures. I am here to help. Think of me as your pie-11.

My love for pie started early
I literally have been making pie since I could crawl up on a chair and stand beside my mom in the kitchen. Pie baking is in my blood! My great grandmother was a pastry chef for an inn in Harbor Springs, Mi back in the early 1900’s. She passed her skills down to her daughters, and subsequently to her great granddaughter. Me! I do not know of anyone else in the family who quite loves making pies like I do. Now do not confuse this with the idea of me making picturesque pies, with fancy lattice crusts. I am not a fussy baker. I believe in quality over style. Don’t get me wrong I like my pies to be appetizing, I just don’t very often fuss around with decorative crusts. I will say, pie is only as good as it’s crust! A pie can be filled with all sorts of deliciousness, however if the crust is not tender, flaky, and delicious unto itself well then why take time to fill it. This is just my opinion. I have a few opinions about pie, but we will get to those later! When I come across a blog post about pie crust I am all over it. I want to see how they do it. I’ve found most pie crust recipes to be very similar. But every once in a while I come across a “scary pie post”. I’m not going to name any names or point any fingers, I’m just saying let’s not make this into rocket science people, ANYONE can make a homemade pie crust. It’s easy. Literally as easy as 1, 2, 3!
There are countless recipes for pie crust. With egg, without egg, some call for vinegar, some with sugar, some without; butter, lard, shortening, or oil. Cookie/shortbread crust. Pastry crust. Graham cracker crust. This post is about the pastry pie crust. It’s really simple. If you can remember flour, shortening or butter, ice water, you’re good to go. Halves. 1 cup flour, 1/2 cup fat, 1/4 cup ice water then, sugar, salt, vinegar. If you can remember the first three ingredients are halved and then 1 teaspoon sugar and half teaspoon salt, give the ice water a dribble of white vinegar. See it’s so easy you won’t even need to look at a recipe.
Gather these ingredients
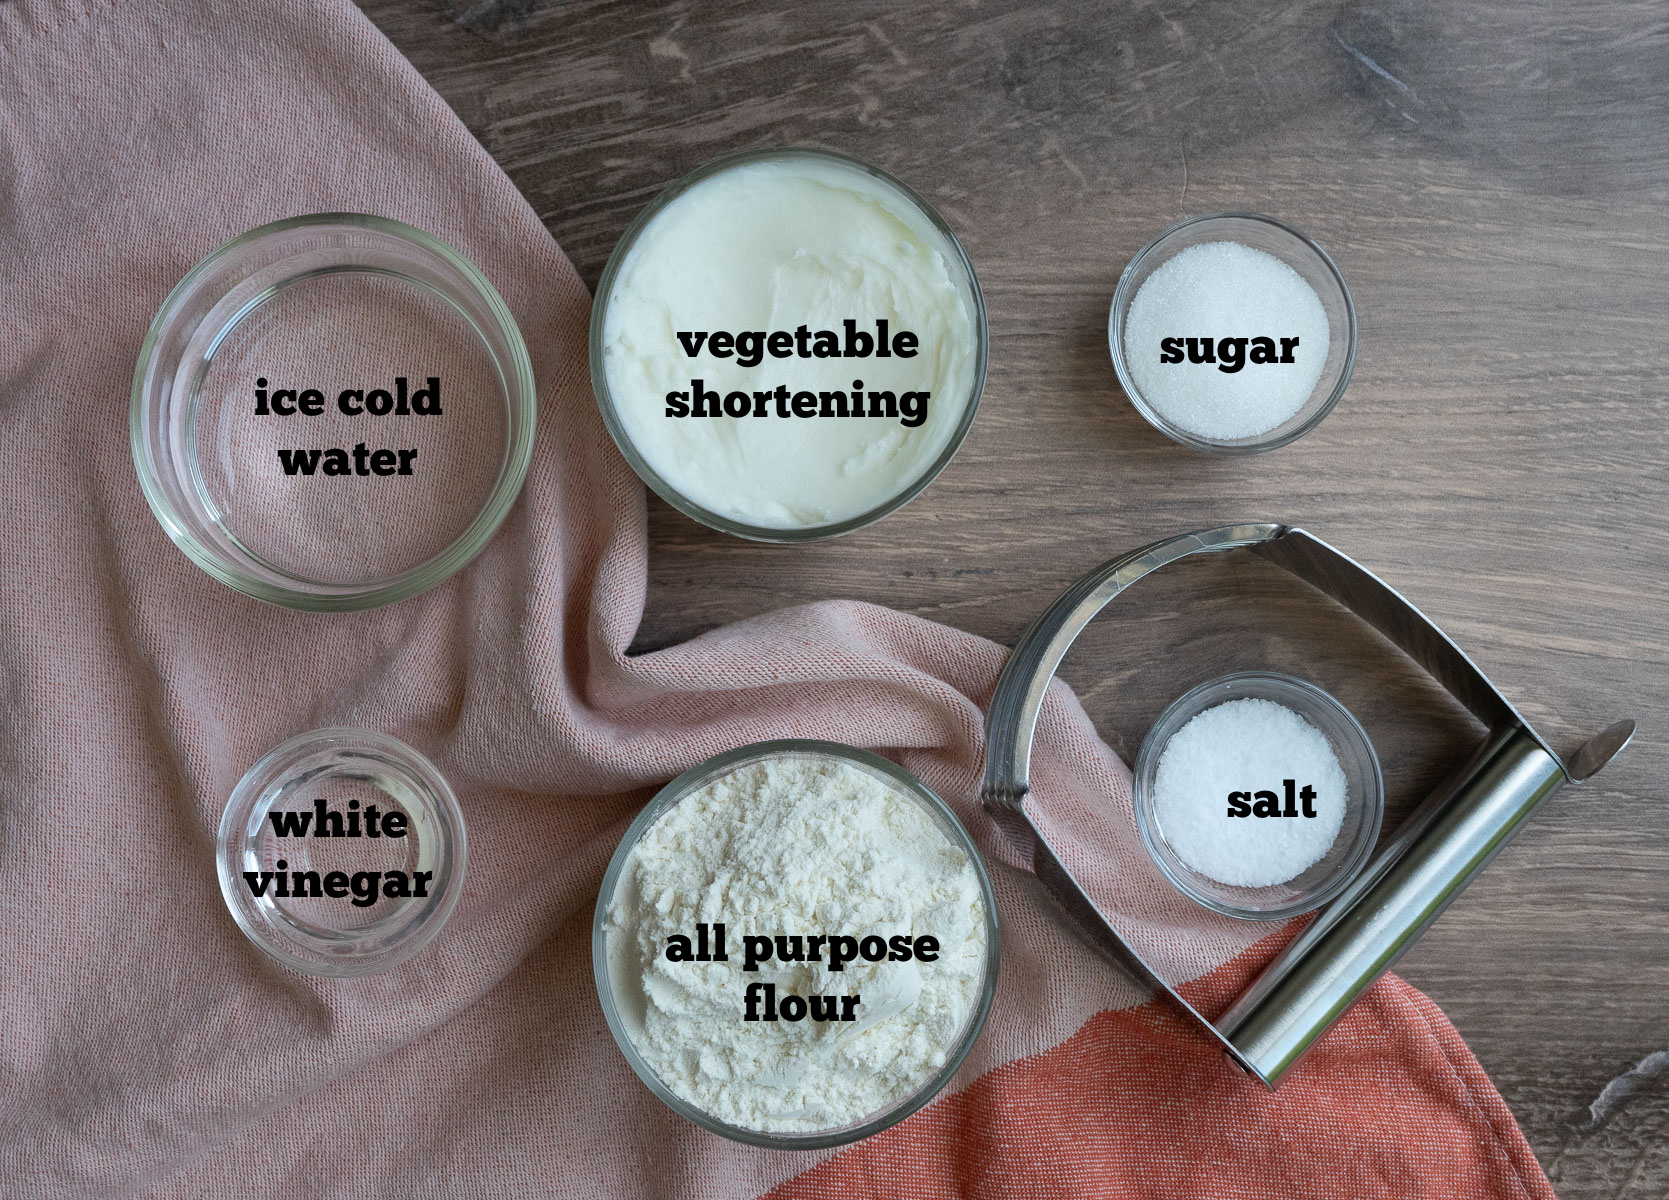
How to make pie crust

When I make crust I usually make a few. So I have them on hand. You never know when you will need to whip yourself up a pie! Pie crust dough wrapped tightly in plastic wrap can be kept in freezer for up to 3 months, or in refrigerator for up to 1 week. If you are making several pies for a celebration, get this part out of the way weeks in advance!
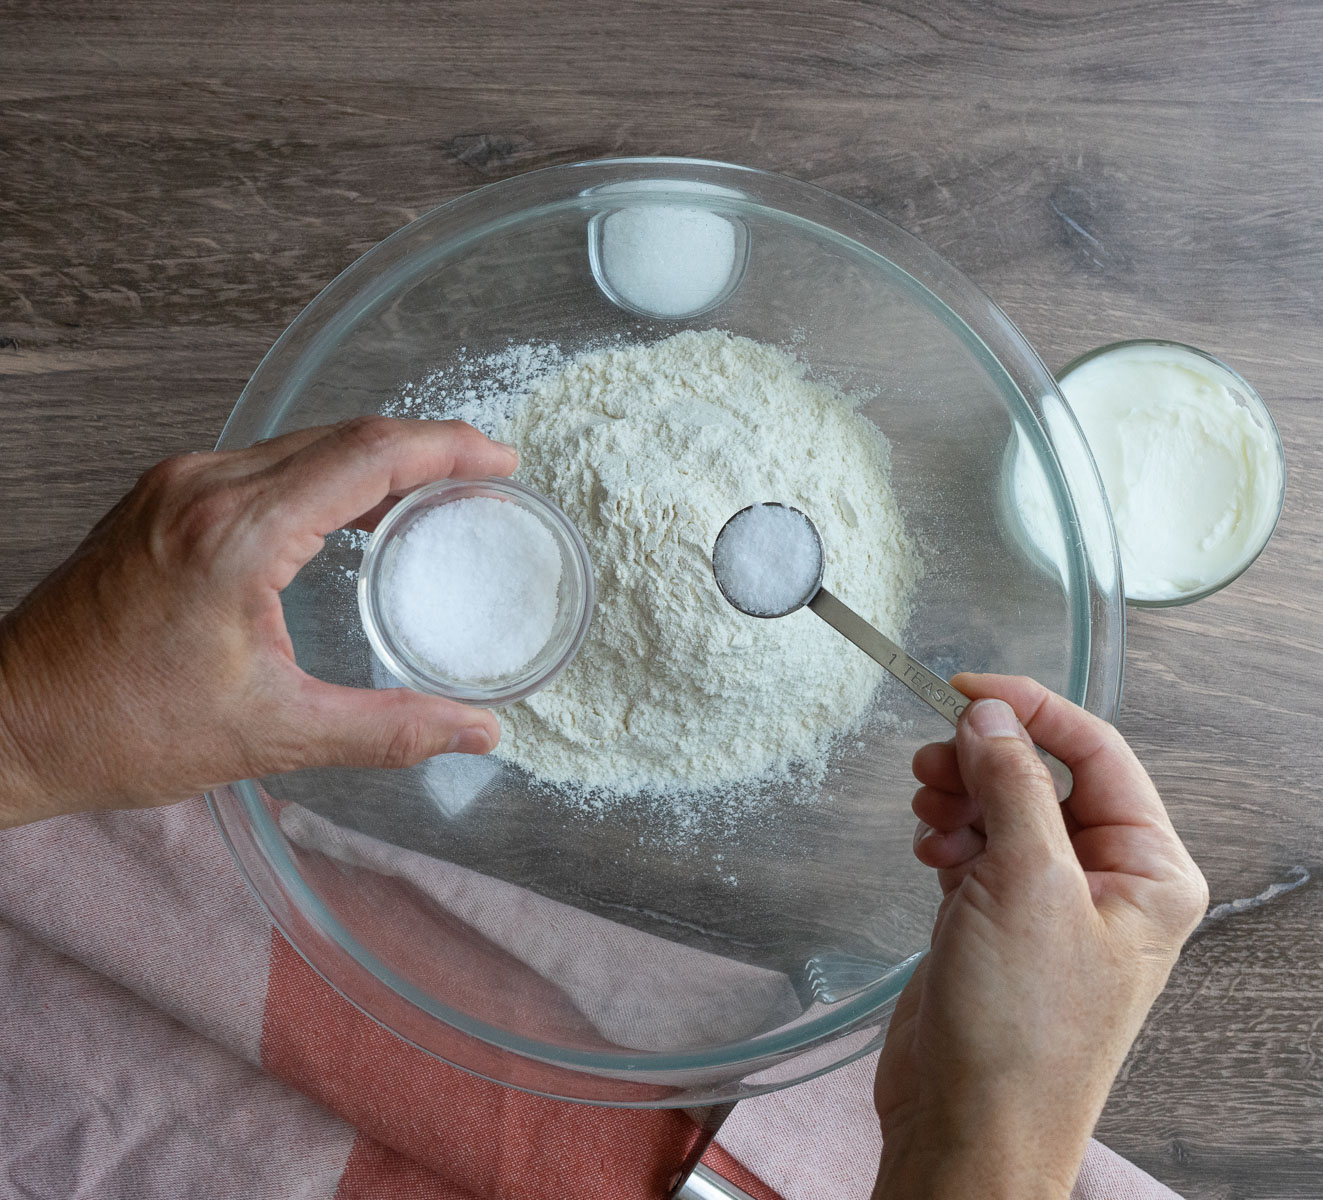
1. For one crust add 1 cup of all purpose flour to a medium sized bowl. Add 1 teaspoon sugar, and 1/2 teaspoon salt, mix together.
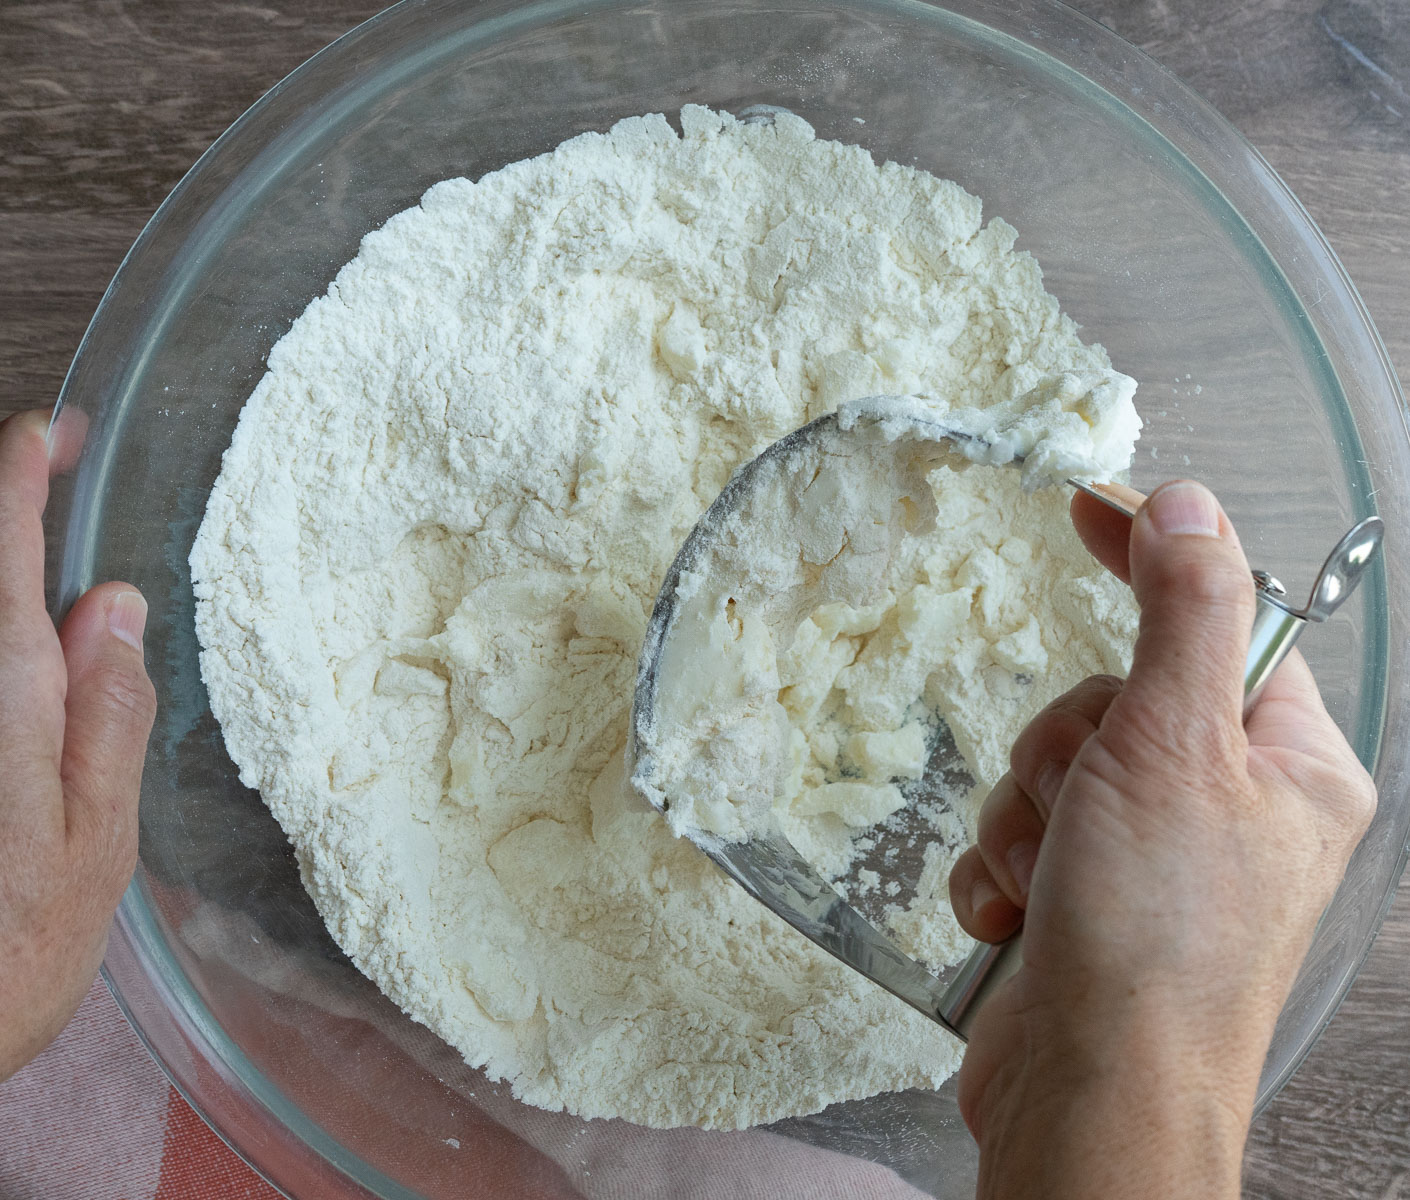
2. Add 1/2 cup fat to your dry ingredients. Using a pastry cutter or a fork cut the fat, in this case vegetable shortening, into the dry ingredients. Cut until the mixture is uniform, and all of the flour has mixed with fat. At this point the crust should be pea or oatmeal sized. Note: Fat is vegetable shortening, butter, or lard. The colder the fat the better. If using butter, take it directly from the refrigerator and cut into cubes. If using a shortening measure into a measuring cup and place it in the freezer for 5 minutes.

Note: See how there are some bigger pieces and some smaller that is how you want it. The smaller pieces help hold the crust together. The larger pieces contain more fat. Creating air pockets when they melt. These will give the crust a nice flaky texture.

3. Next sprinkle the ice water over the flour mixture. I actually put ice in my water and fish it out before sprinkling. You want really cold water. The vinegar does something to the gluten strands, something about acid and fat and well anyway it makes your crust flakier. But if you find you are plumb out of white vinegar then you could use lemon juice or just leave out the acid all together. It will be fine. I promise.

4. Use a fork and gently pull the dough together. Then using lightly floured fingers, pull dough into a ball, and flatten into a disc. LESS is more. At this point you do not want to work your dough too much, and you definitely do not want to get it warm from working it with the palms of your hands; this is why you should use finger tips. Have a piece of plastic wrap ready. Set dough on plastic wrap and wrap it tightly. Place in the refrigerator for a minimum of 1 hour, and up to one week, before rolling it out to make your pie.

No kneading necessary, this is not bread dough. After pulling dough together with a fork, use your hands to bring the dough together in a ball and flatten it out into a disc. Your hands are warm, and will melt the fat in the dough, so don’t fuss with it too long. Form into a disc and wrap dough tightly in plastic wrap, pop it in the refrigerator for at least 30 minutes before rolling out. If you are pressed for time then do whatcha gotta do, and start making your pie.

As you can see I am cutting this dough in half because I made two at once!
Note: Doubling, tripling, and quadrupling is very easy to do with this pie crust recipe. If you are making one why not make two, three, or four!

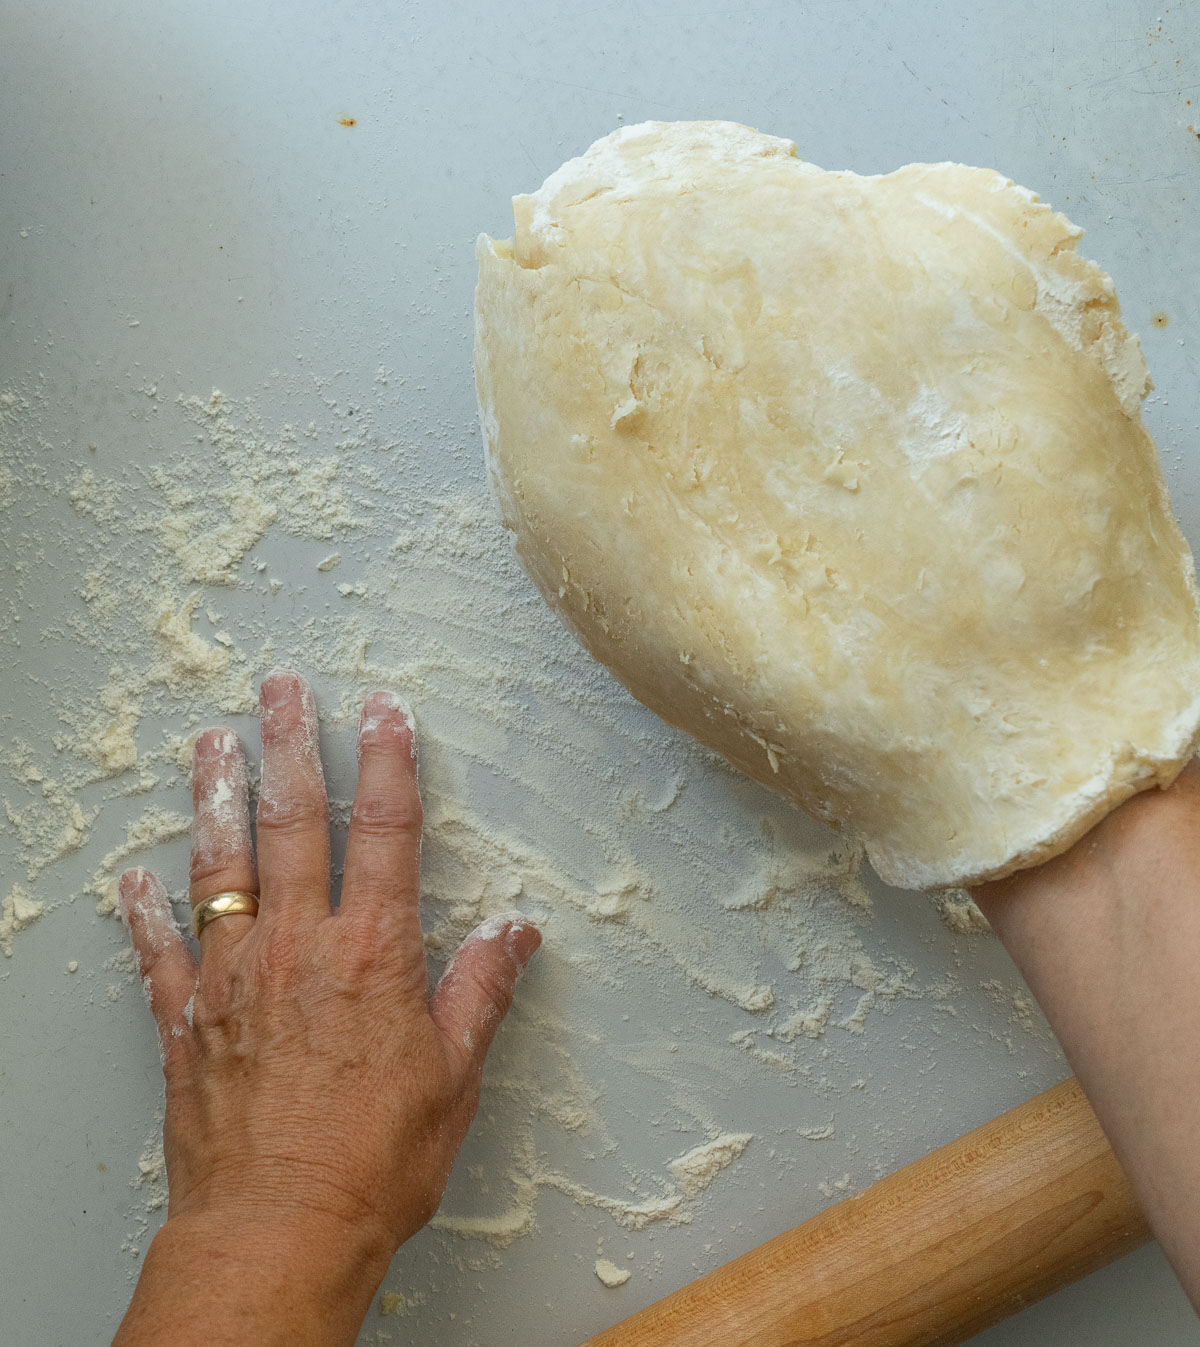
5. Lightly flour counter top, place cold pie dough disc on counter. Sprinkle top of dough with flour, and dust your hands with flour.

6a. With minimum rolling you want to get your pie dough rolled out into a 12-14 inch circle. Start in the middle and roll up with firm even pressure. Pick up the rolling pin, start in the middle and roll downward with firm even pressure.

6b. Lift rolling pin and switch directions, rolling aways from the middle out in any direction to make a 12-14 inch pie dough disc that is approximately 1/8 inch thick. Your circle may be larger that’s ok.
Note: Move your rolling pin, after each roll, to get a different angle, this helps roll dough into a circular shape. You may have to lift up dough and scatter flour underneath, so the dough doesn’t stick to the countertop.
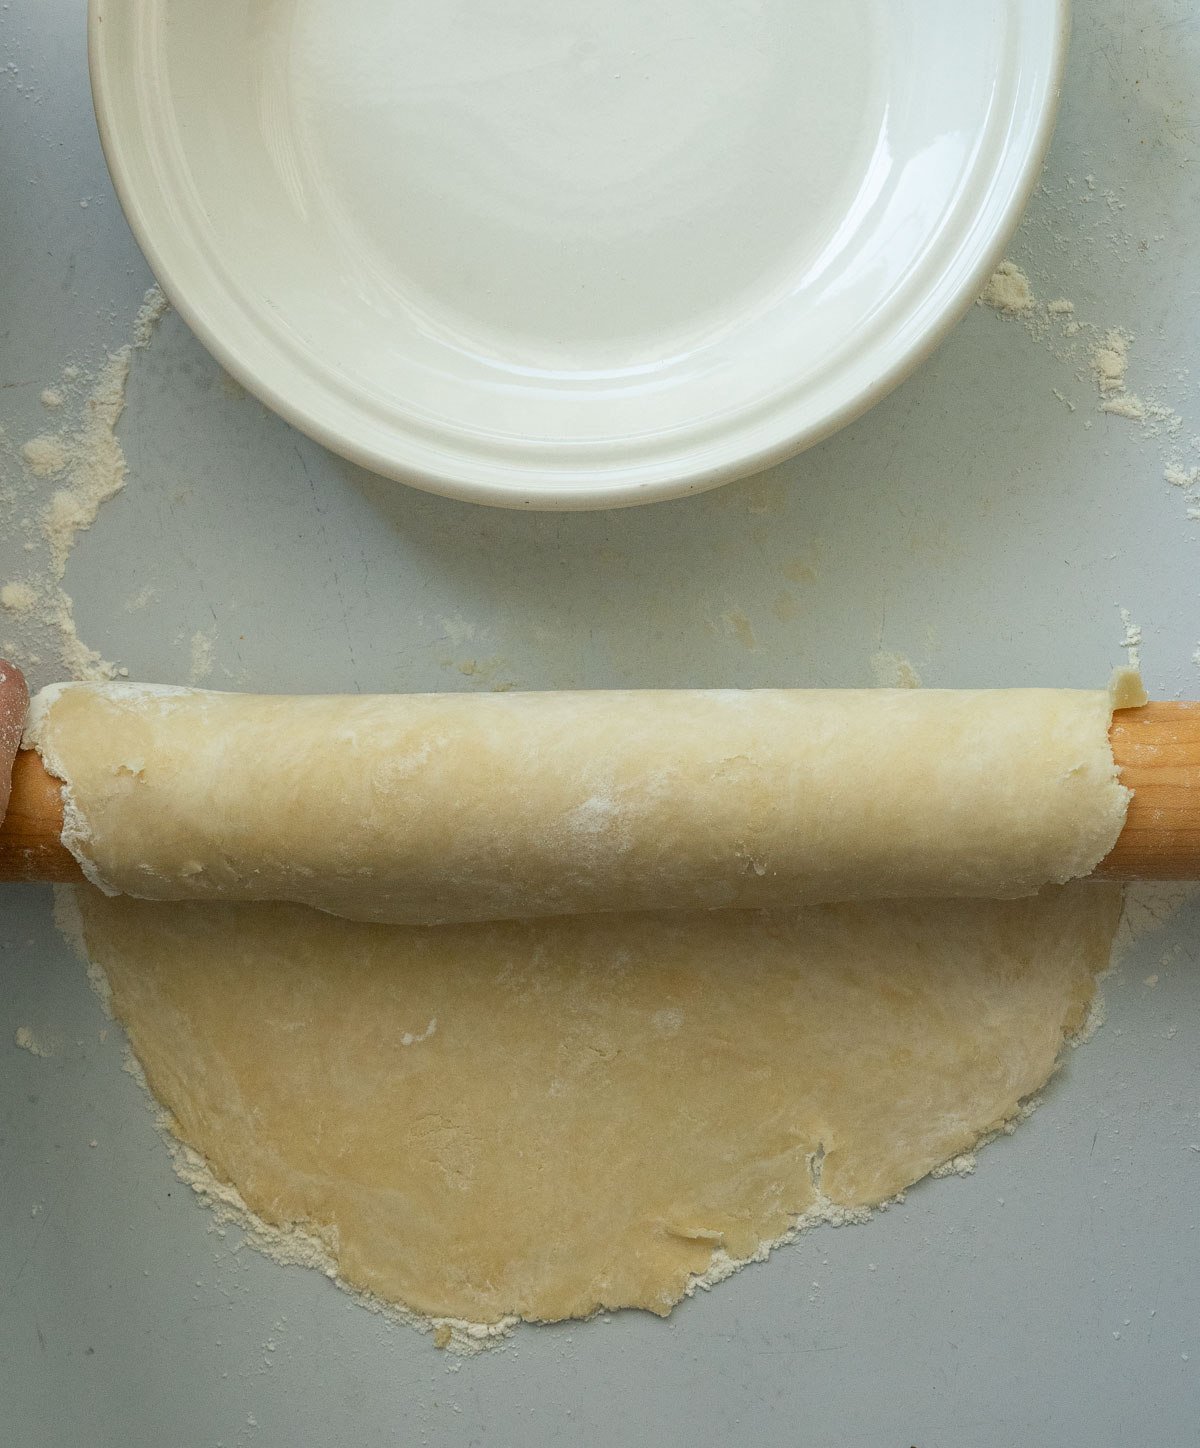
7a. The hard part is done. Now it’s time to get that crust moved to the pie dish. Place the rolling pin in the middle of the circle and fold pie crust back over the rolling pin.

7b. Now lift up your rolling pin with the pie dough draped over it and roll pie crust out over the pie plate.
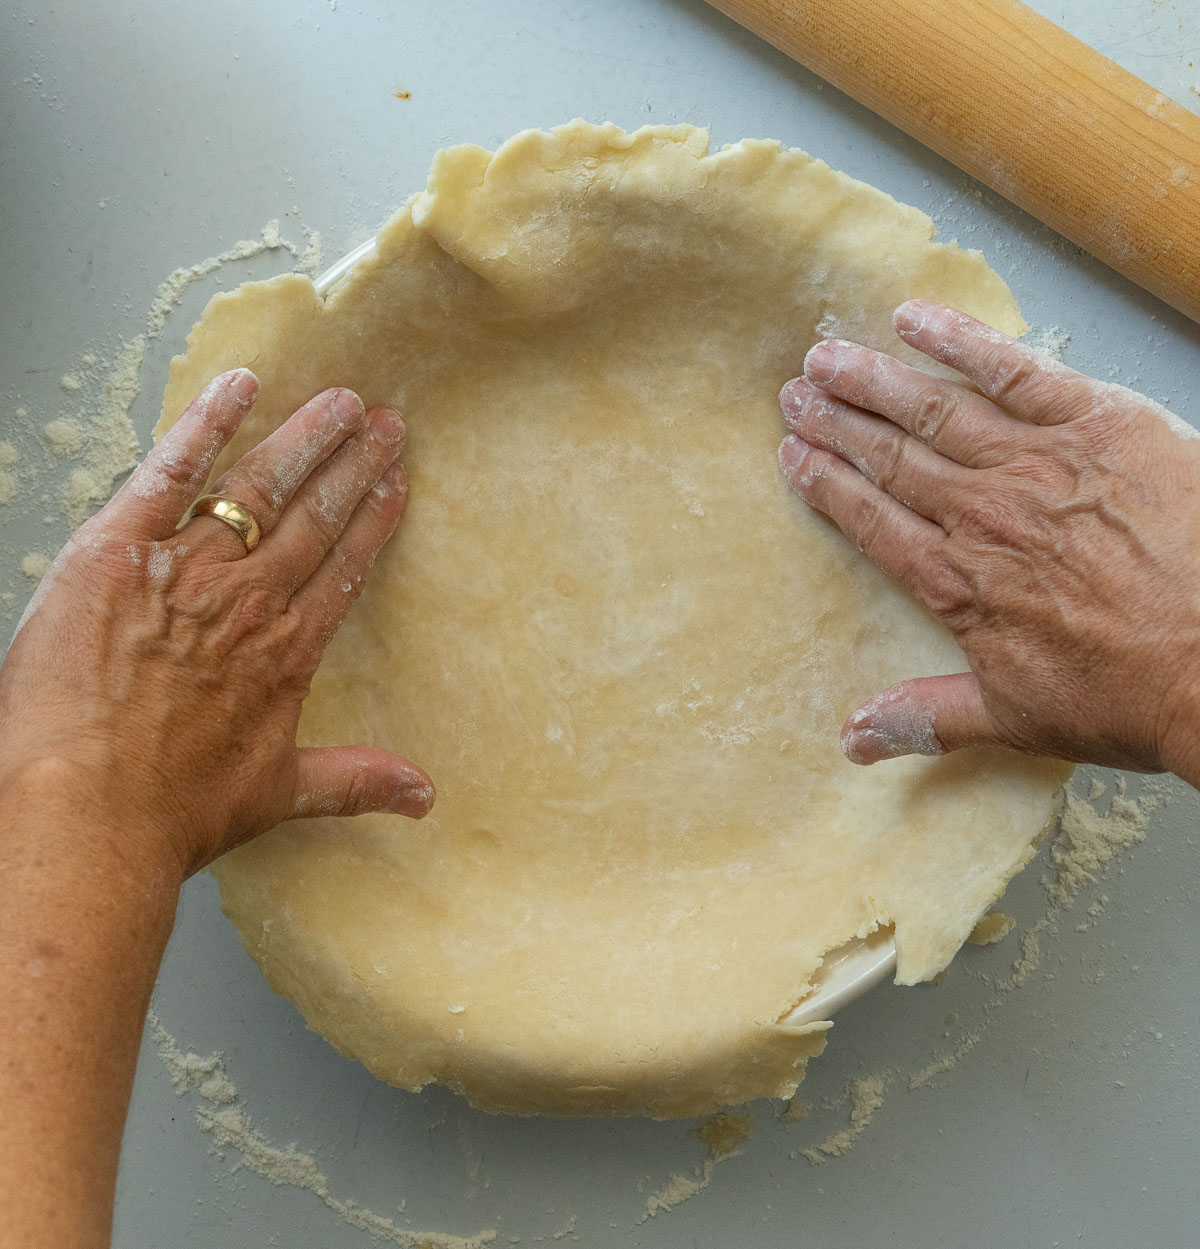
7c. Press the pie dough into the pie plate, pushing out any air pockets. Trim edges hanging over the pie plate to 1 inch. Any areas that are void of pie crust you may need to patch some pie dough in.

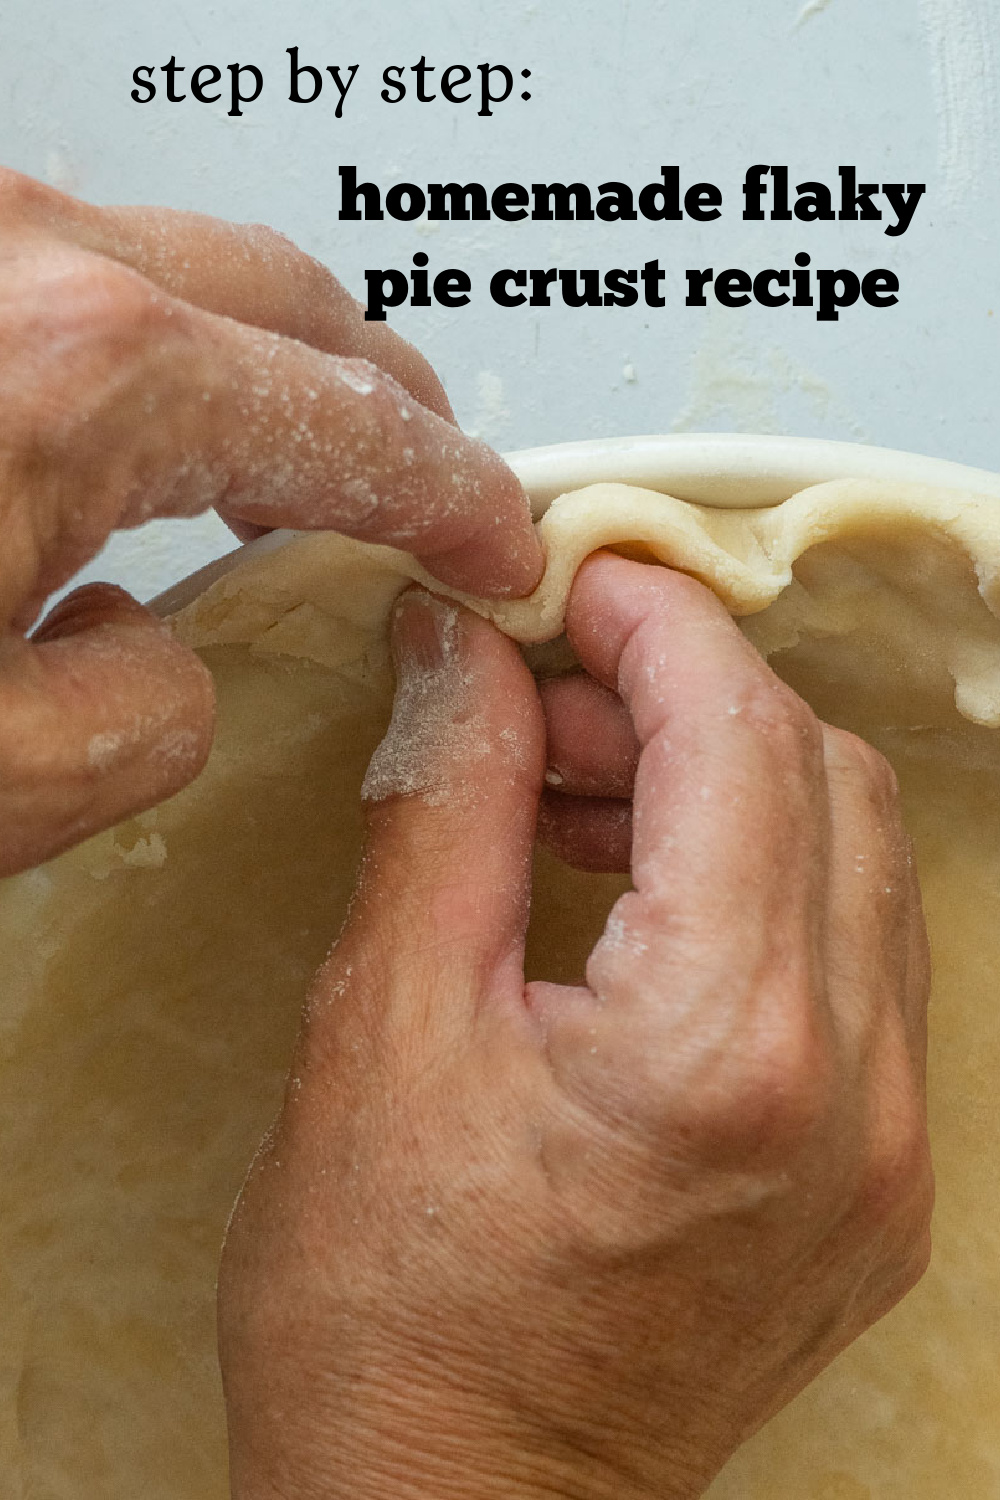
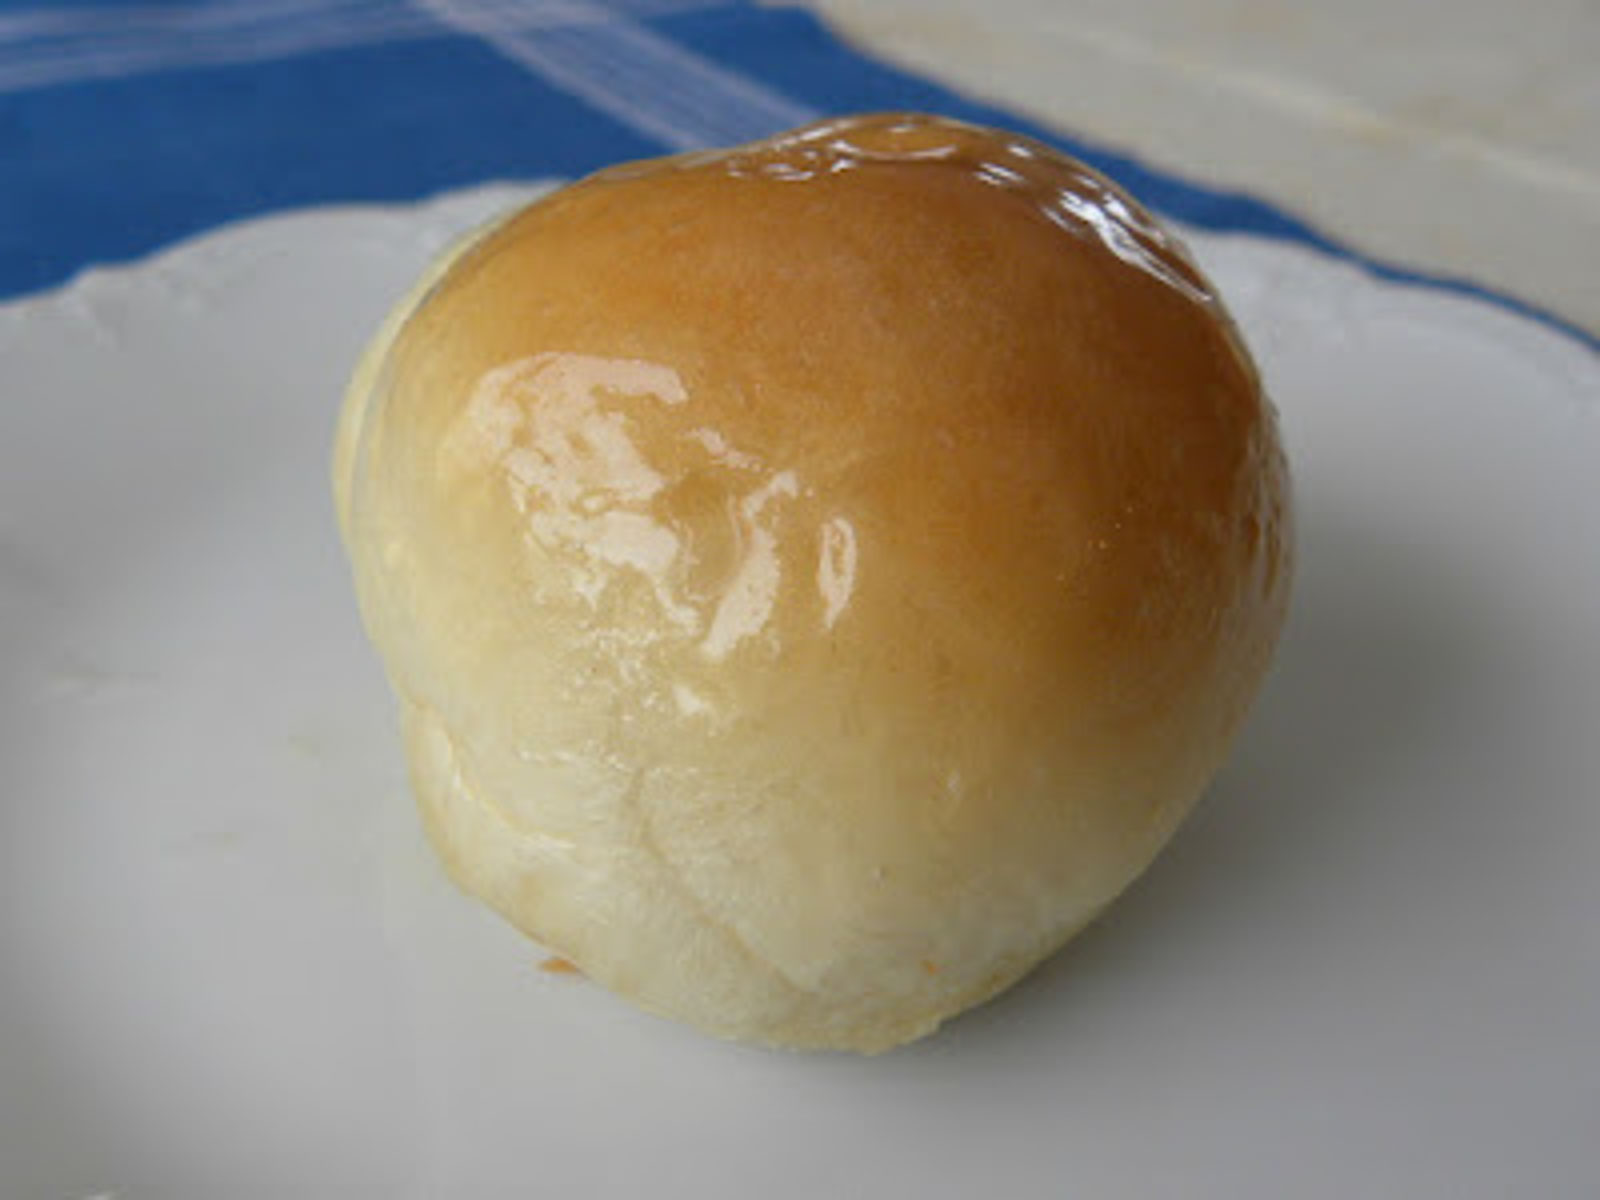
8. Fold the extra 1 inch in and give it a crimp. Everyone has their own pie edging style. Make it your own! (If you are making a double crusted pie, fill and lay the top crust over the filling, seal the dough together by folding the crust inward, not under. Folding inward will help direct any juices back into the pie. Cut a slit in the top, this allows any built up steam a way out. See mini pie below.

Brush top crust with egg wash, or milk and sprinkle with turbinado sugar.
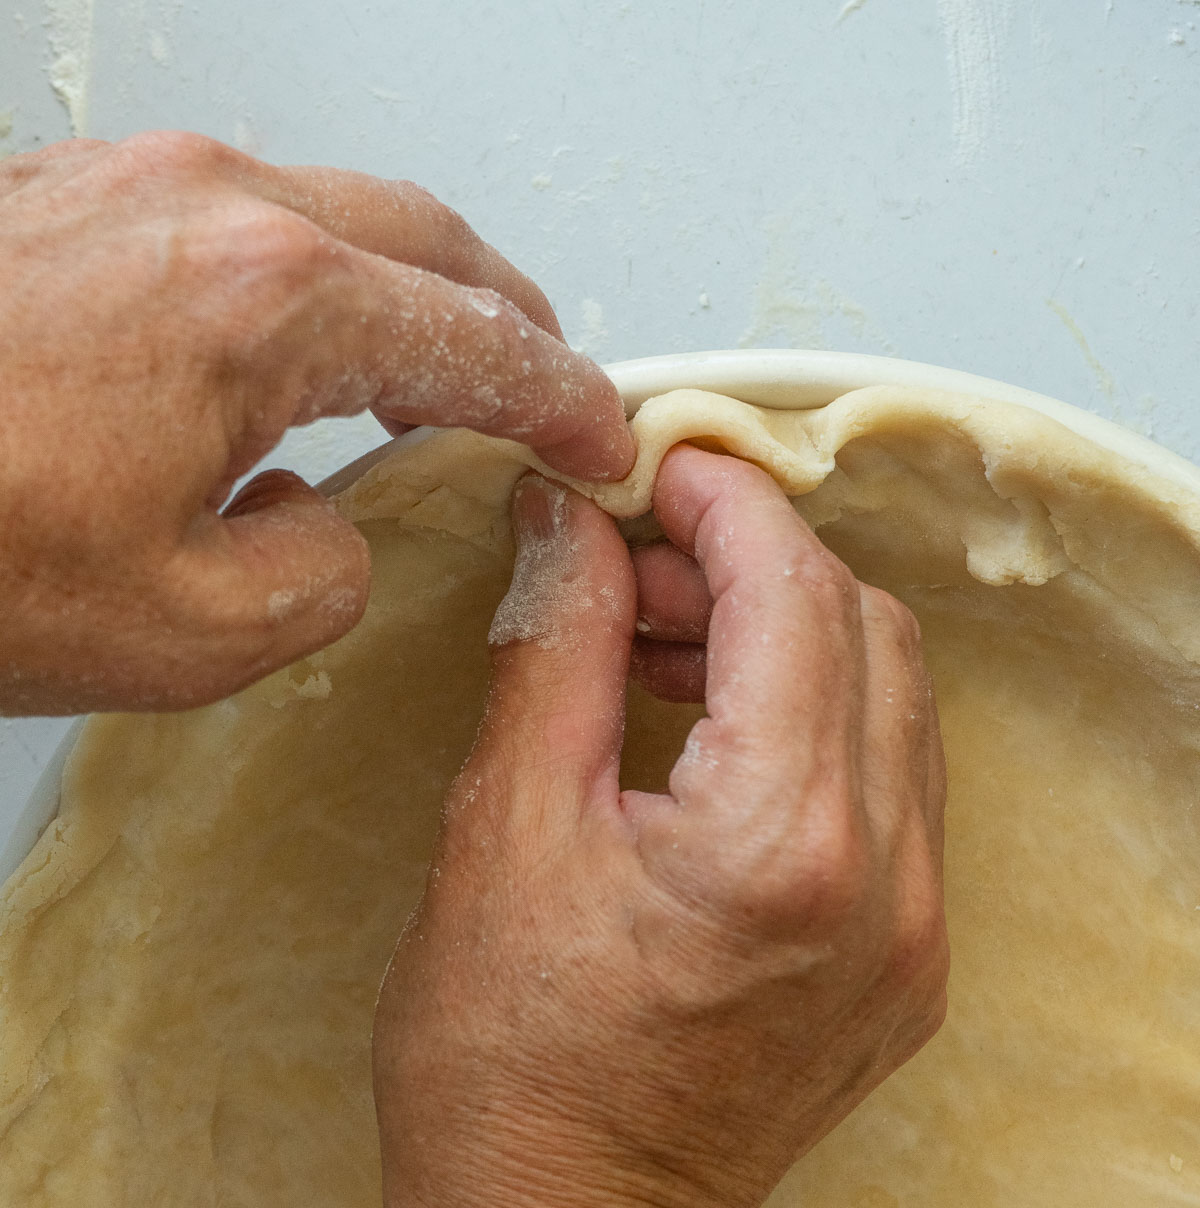
This is my technique for crimping the edges of my pie crust. If you google it beware, you will get approximately 1 bazillion tutorials. If I said it once I’ll say it a 100 more times, it’s not rocket science. You will get into a groove of how you like to do your crust, and I’m sure it will look amazing and taste even better!!

This is my lattice crusted Peach Crumble Pie. Feel free to get fancy with your crust. I usually don’t get too fancy with my pies. But I may show you few fun ways to fancy up your pies later in the week. I don’t want to give away all my tricks today.
Tips & Variations
- if you are baking a fruit pie it’s always a good idea to bake your pie on a cookie sheet to avoid run over onto your oven floor.
- Blind Baking: Is a technique used when you are making a pie that doesn’t need the filling baked; such as a fresh fruit pie or a creme pie.
- Par Baking: Is a technique just like blind baking however you partially bake the crust then add the filling and bake the crust. This can be done with any pie if you are worried about soggy bottom; pumpkin pie comes to mind. See the blind baking tutorial for par baking.
- Make ahead: You can make pie crust up to 3 months in advance if freezing, or one week in advance for refrigeration. Before making a pie with a frozen crust leave on counter and allow to thaw enough so that pie dough can be rolled out easily.
- Butter vs Crisco: I am a fan of both. I grew up only ever having pie crust made with vegetable shortening/ Crisco. Crisco like lard makes for a very flaky crust. Their melting point is higher, allowing for more leeway when working with the dough. So it’s up to you using butter gives a more flavorful crust, just keep it cold and try not to over work dough. I will often use both. Hopefully this is helpful and not too confusing.
The Best Pie Crust Recipe
Equipment
- rolling pin
- pastry cutter
- pie plate
Ingredients
- 2 cups all purpose flour
- 2 tsp sugar
- 1 tsp salt
- 1 cup vegetable shortening or butter or a combination of both
- 1/2 cup ice cold water
- 1 tsp white vinegar
Nutrition


Your tip about folding the crust inward instead of under is brilliant! I’ve been baking pies for over 25 years and never thought of doing that. I did it this time and it works like a charm. Thanks!!
Thanks for posting this! I have a no fail recipe that calls for eggs, and here I am on Thanksgiving Eve, out of eggs! Your crust came together beautifully and is chilling as I type. I can’t wait to make my husband’s favorite Mincemeat Pie! Thanks again! 🙂
Yeh! So glad it worked out for you! Come back again soon! Happy Thanksgiving, Sheila
So which is it that honestly gives a good pie crust its flakiness… vinegar or cutting the flour/shortening mixture too finely? Which of these two things could be omitted and the crust still turn out nice and flaky?
Sheila, this is awesome! I have to admit that I’m not a good pie crust maker. But this recipe and step by step photos makes me wanna try. I’ll let you know how I do! Thanks for the great tutorial!!!